


PEG BOARDS -HOW TO DECORATE DIY GIANT PEGBOARDS
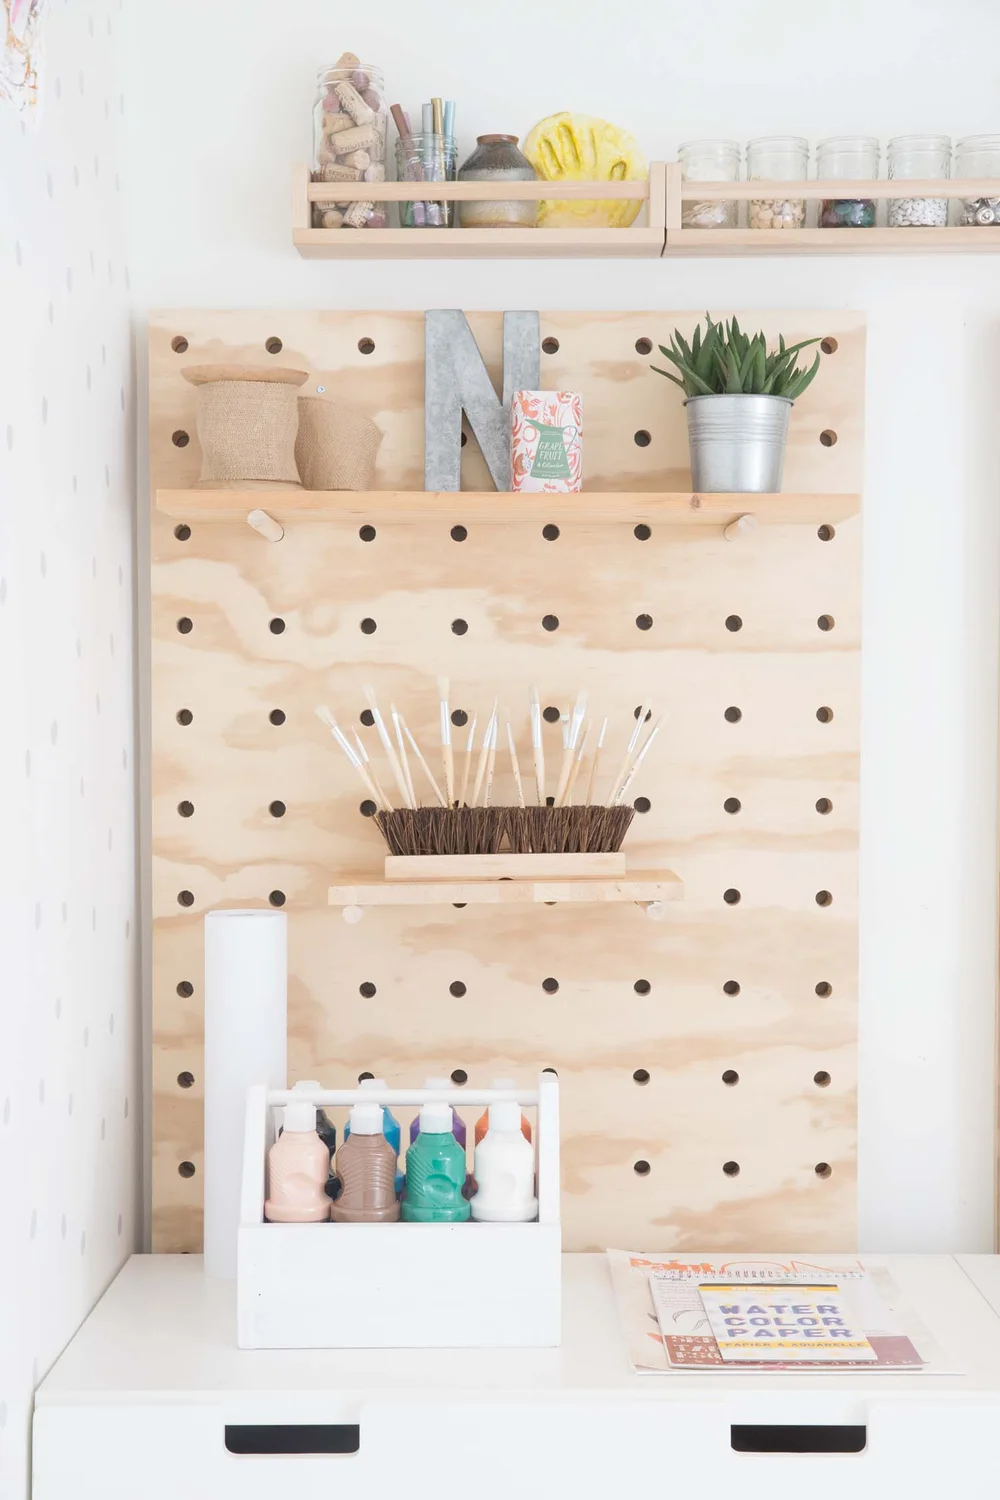
Since posting our kids creative art space, I've been asked countless times where we found the giant pegboard!
We didn't buy these pegboards but had them made especially for the space. Instead of replying to each one of you, I thought writing a short post explaining our process could help all of you if you are interested in creating this look for your own home.
I started by using this amazing tutorial and modified it by adding a second board behind the first so that we could have shelves that hold much more weight, as you can see in the photo below.

Once the wood was purchased and cut (thanks Home Depot!), the next step was marking out where the holes would go and we did this with a black Sharpie marker and level. I decided on making the holes 4 inches apart and at least 2 inches from each edge and ensured the top holes were started at the same point on each board (so that it would look right to the eye once mounted).
With two boards, it allows the dowel to go through both boards and will therefore hold more weight. I also wanted a way to know if the kids had pulled a dowel out without the entire shelf falling to the floor. So far, nothing has moved an inch so it seems the boards are very solid yet still appear streamlined!
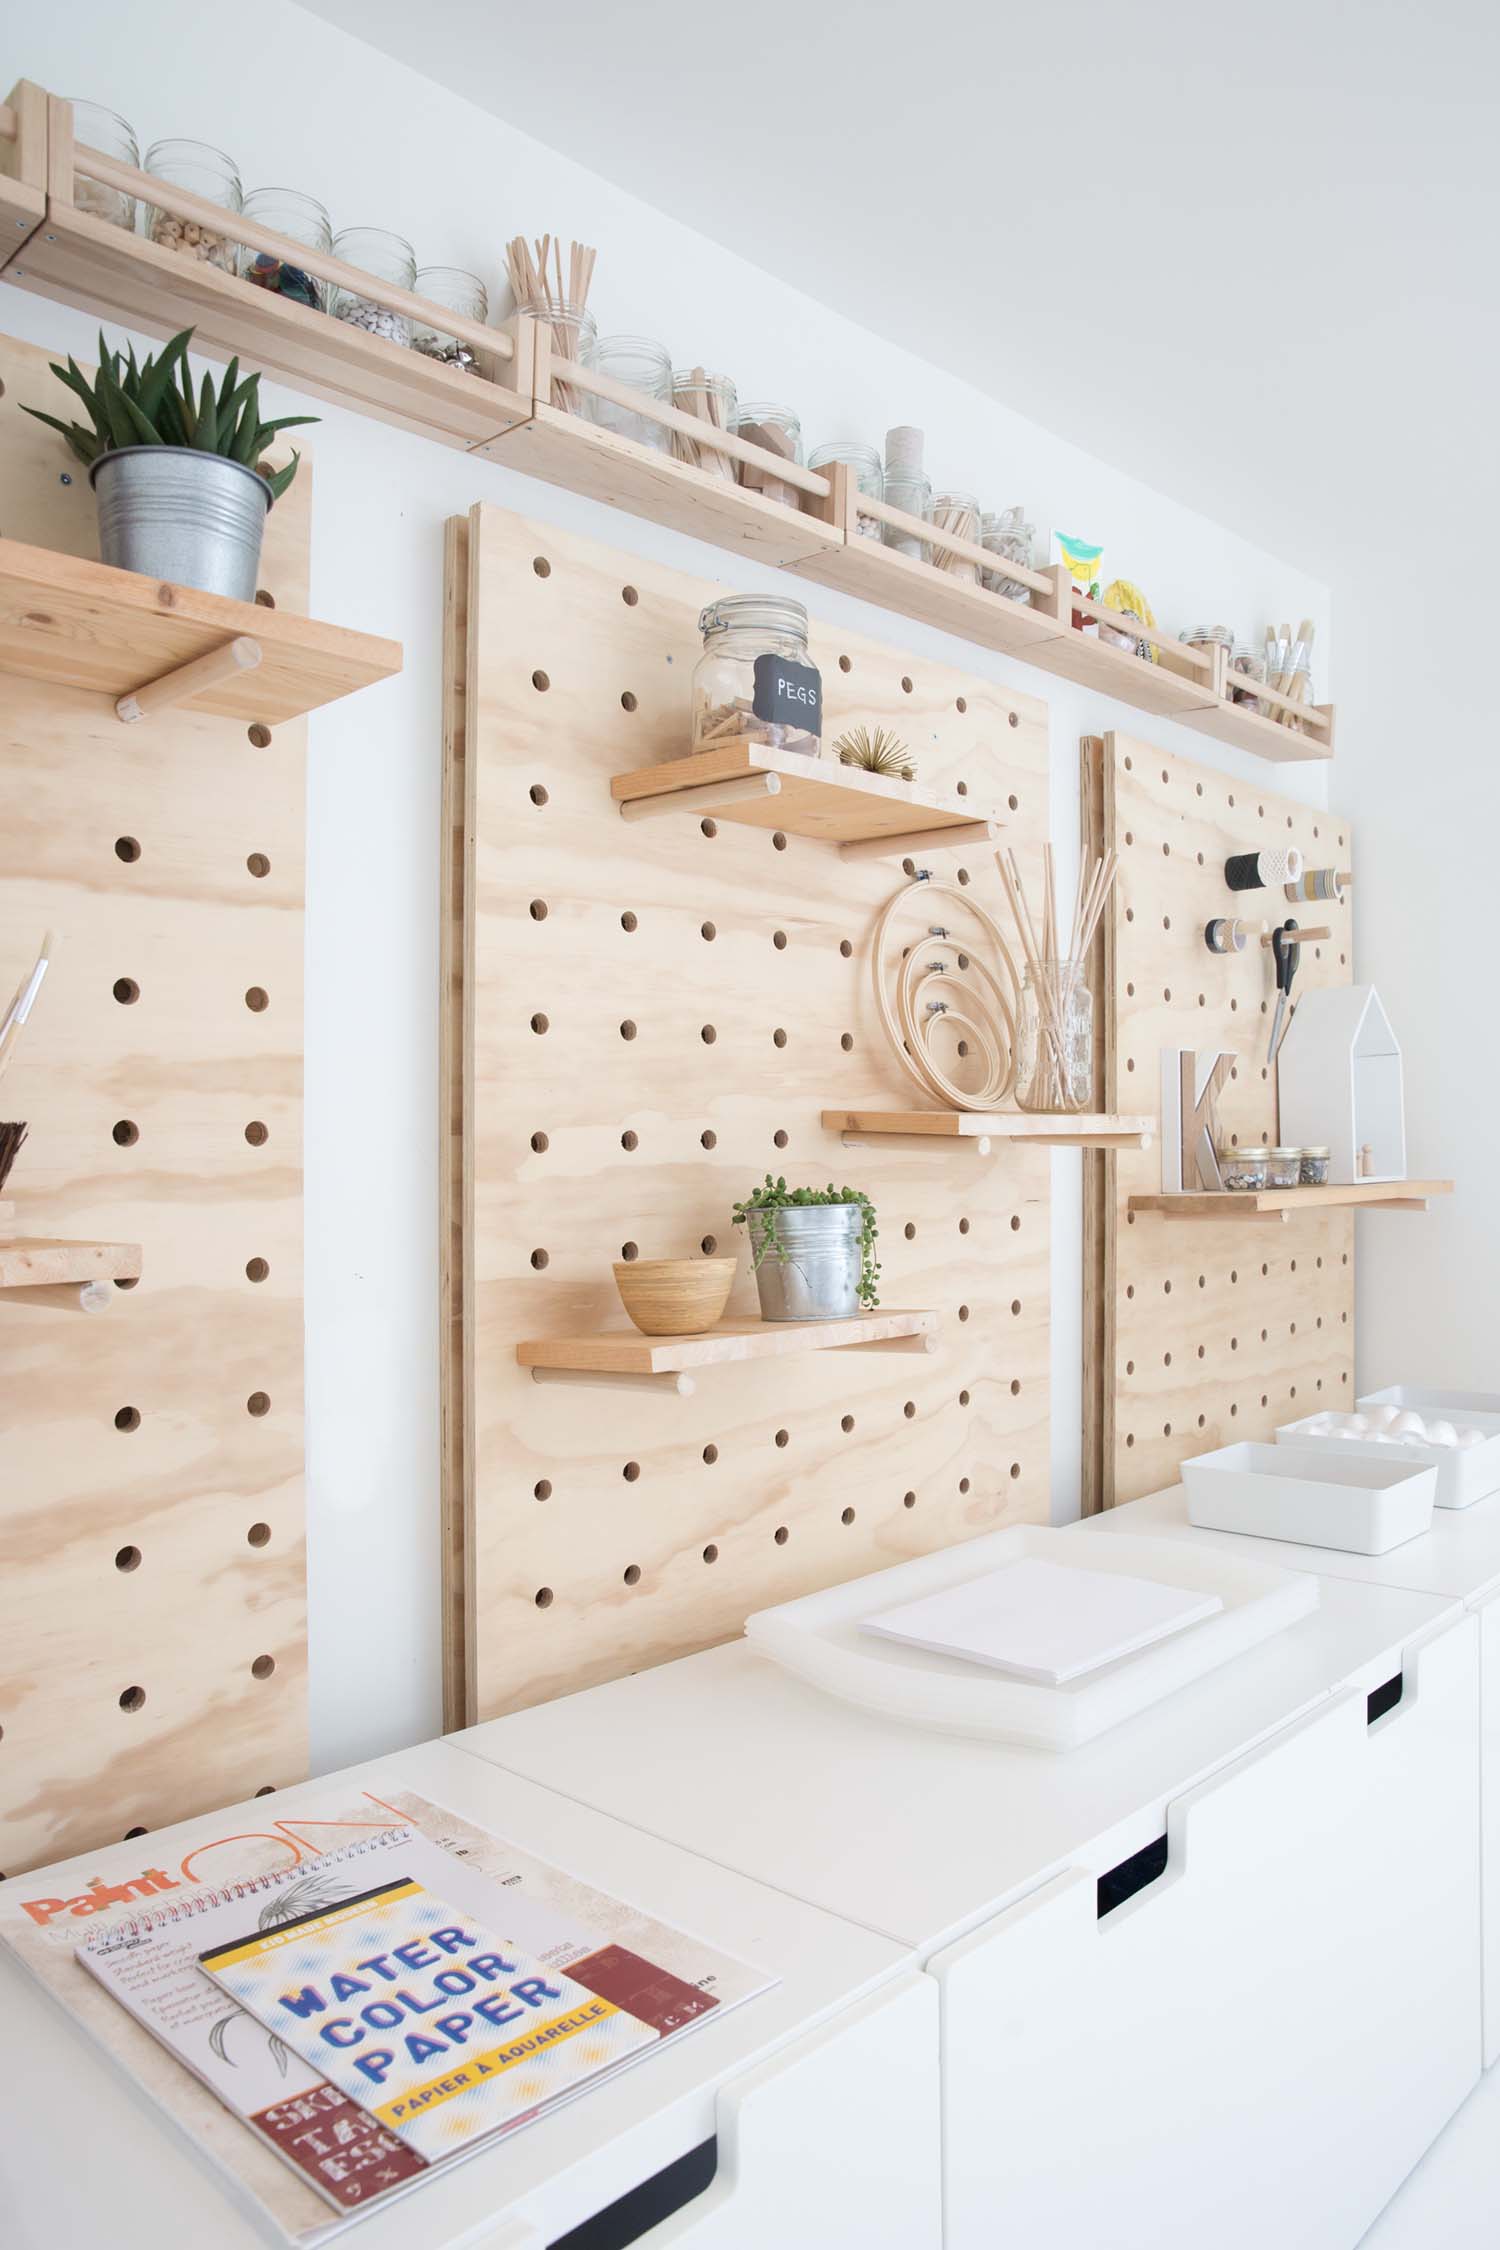
The boards are quite heavy and so the back board is drilled into a stud in at least one place on each pegboard and the front board is drilled onto the back board with a small piece of wood between to allow a bit of space and provide extra strength. All boards are sitting on a 2x4 at the bottom behind the storage drawers to add an extra support.
If you have any questions at all, please add them to the comments and I will answer them there!
